Verbate uses Auth0 to manage identity, so the below process gives us the information we need to leverage Auth0’s Okta Enterprise Connection.
To create an Okta Enterprise Connection, we’ll need to exchange a few pieces of information. When we’ll use these pieces of information will be explained below.
What Information We’ll Exchange
What you’ll need from Verbate:
- Our Sign-in redirect URI - provided by Verbate
- Our Logo
What we’ll need from you:
- Your Okta domain information
- It’s usually something like “Acme.okta.com”
- Your Client ID & Client Secret
- You’ll create these when we create the application in Okta.
Create an Okta OIDC Application
To connect your Okta tenant as an identity provider for Verbate, you must create an OIDC application. In your Okta Admin Dashboard, create a new application.
Select Applications > Applications, and Create App Integration.
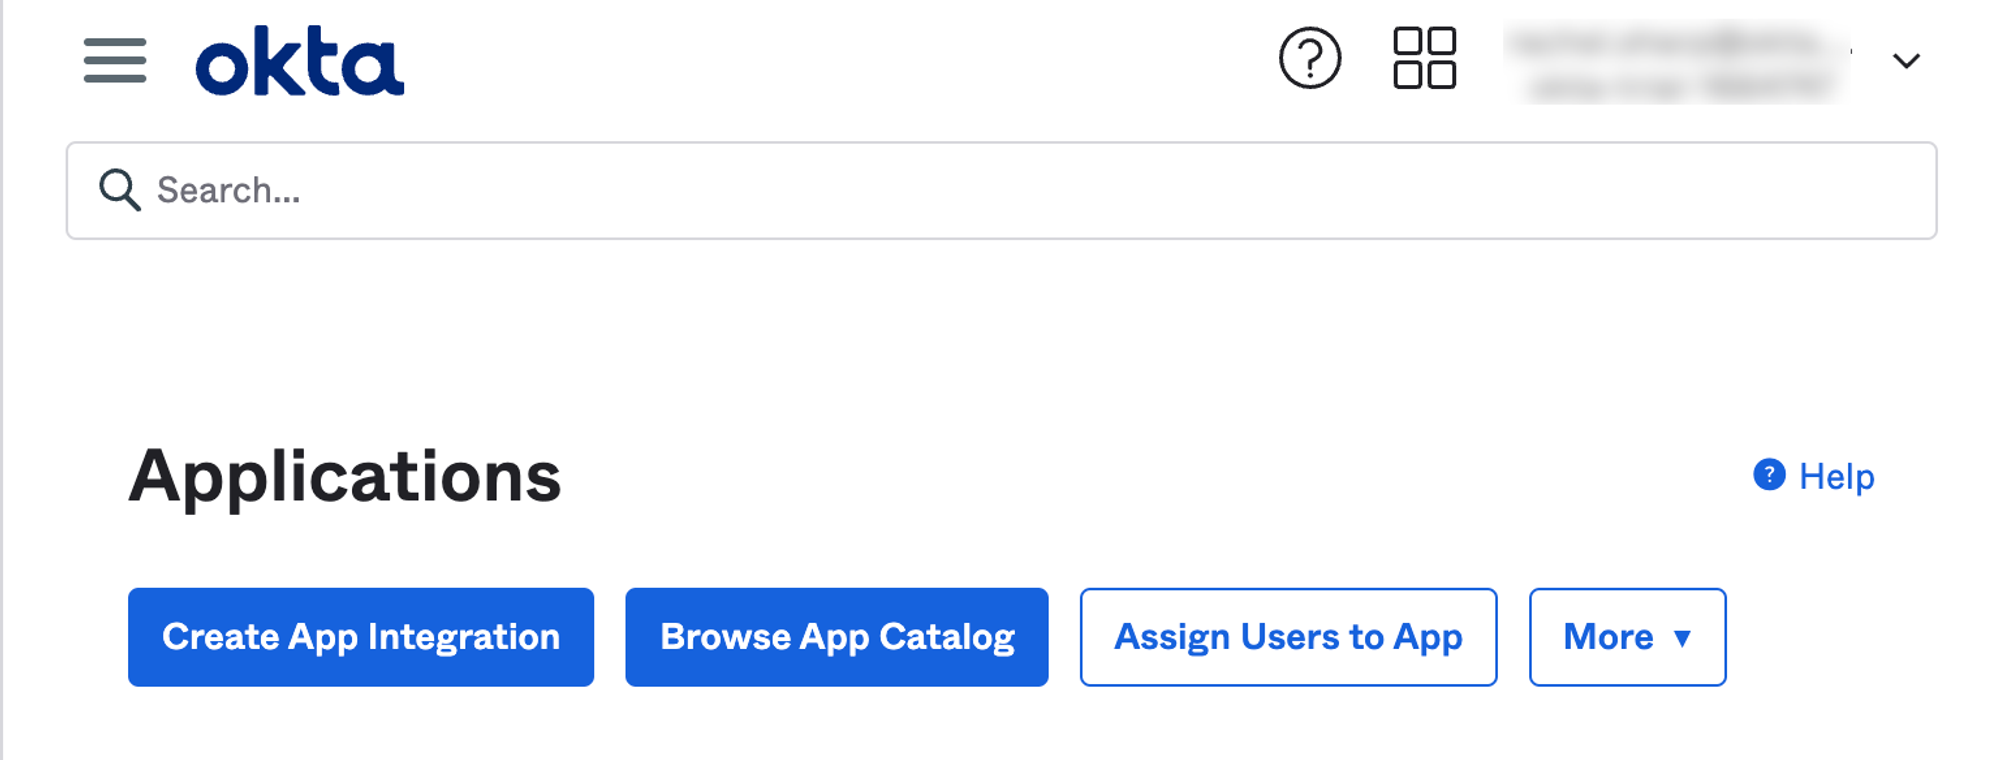
Select Create New App.
Choose OIDC as the Sign-in method. Choose Web Application as your Application Type.
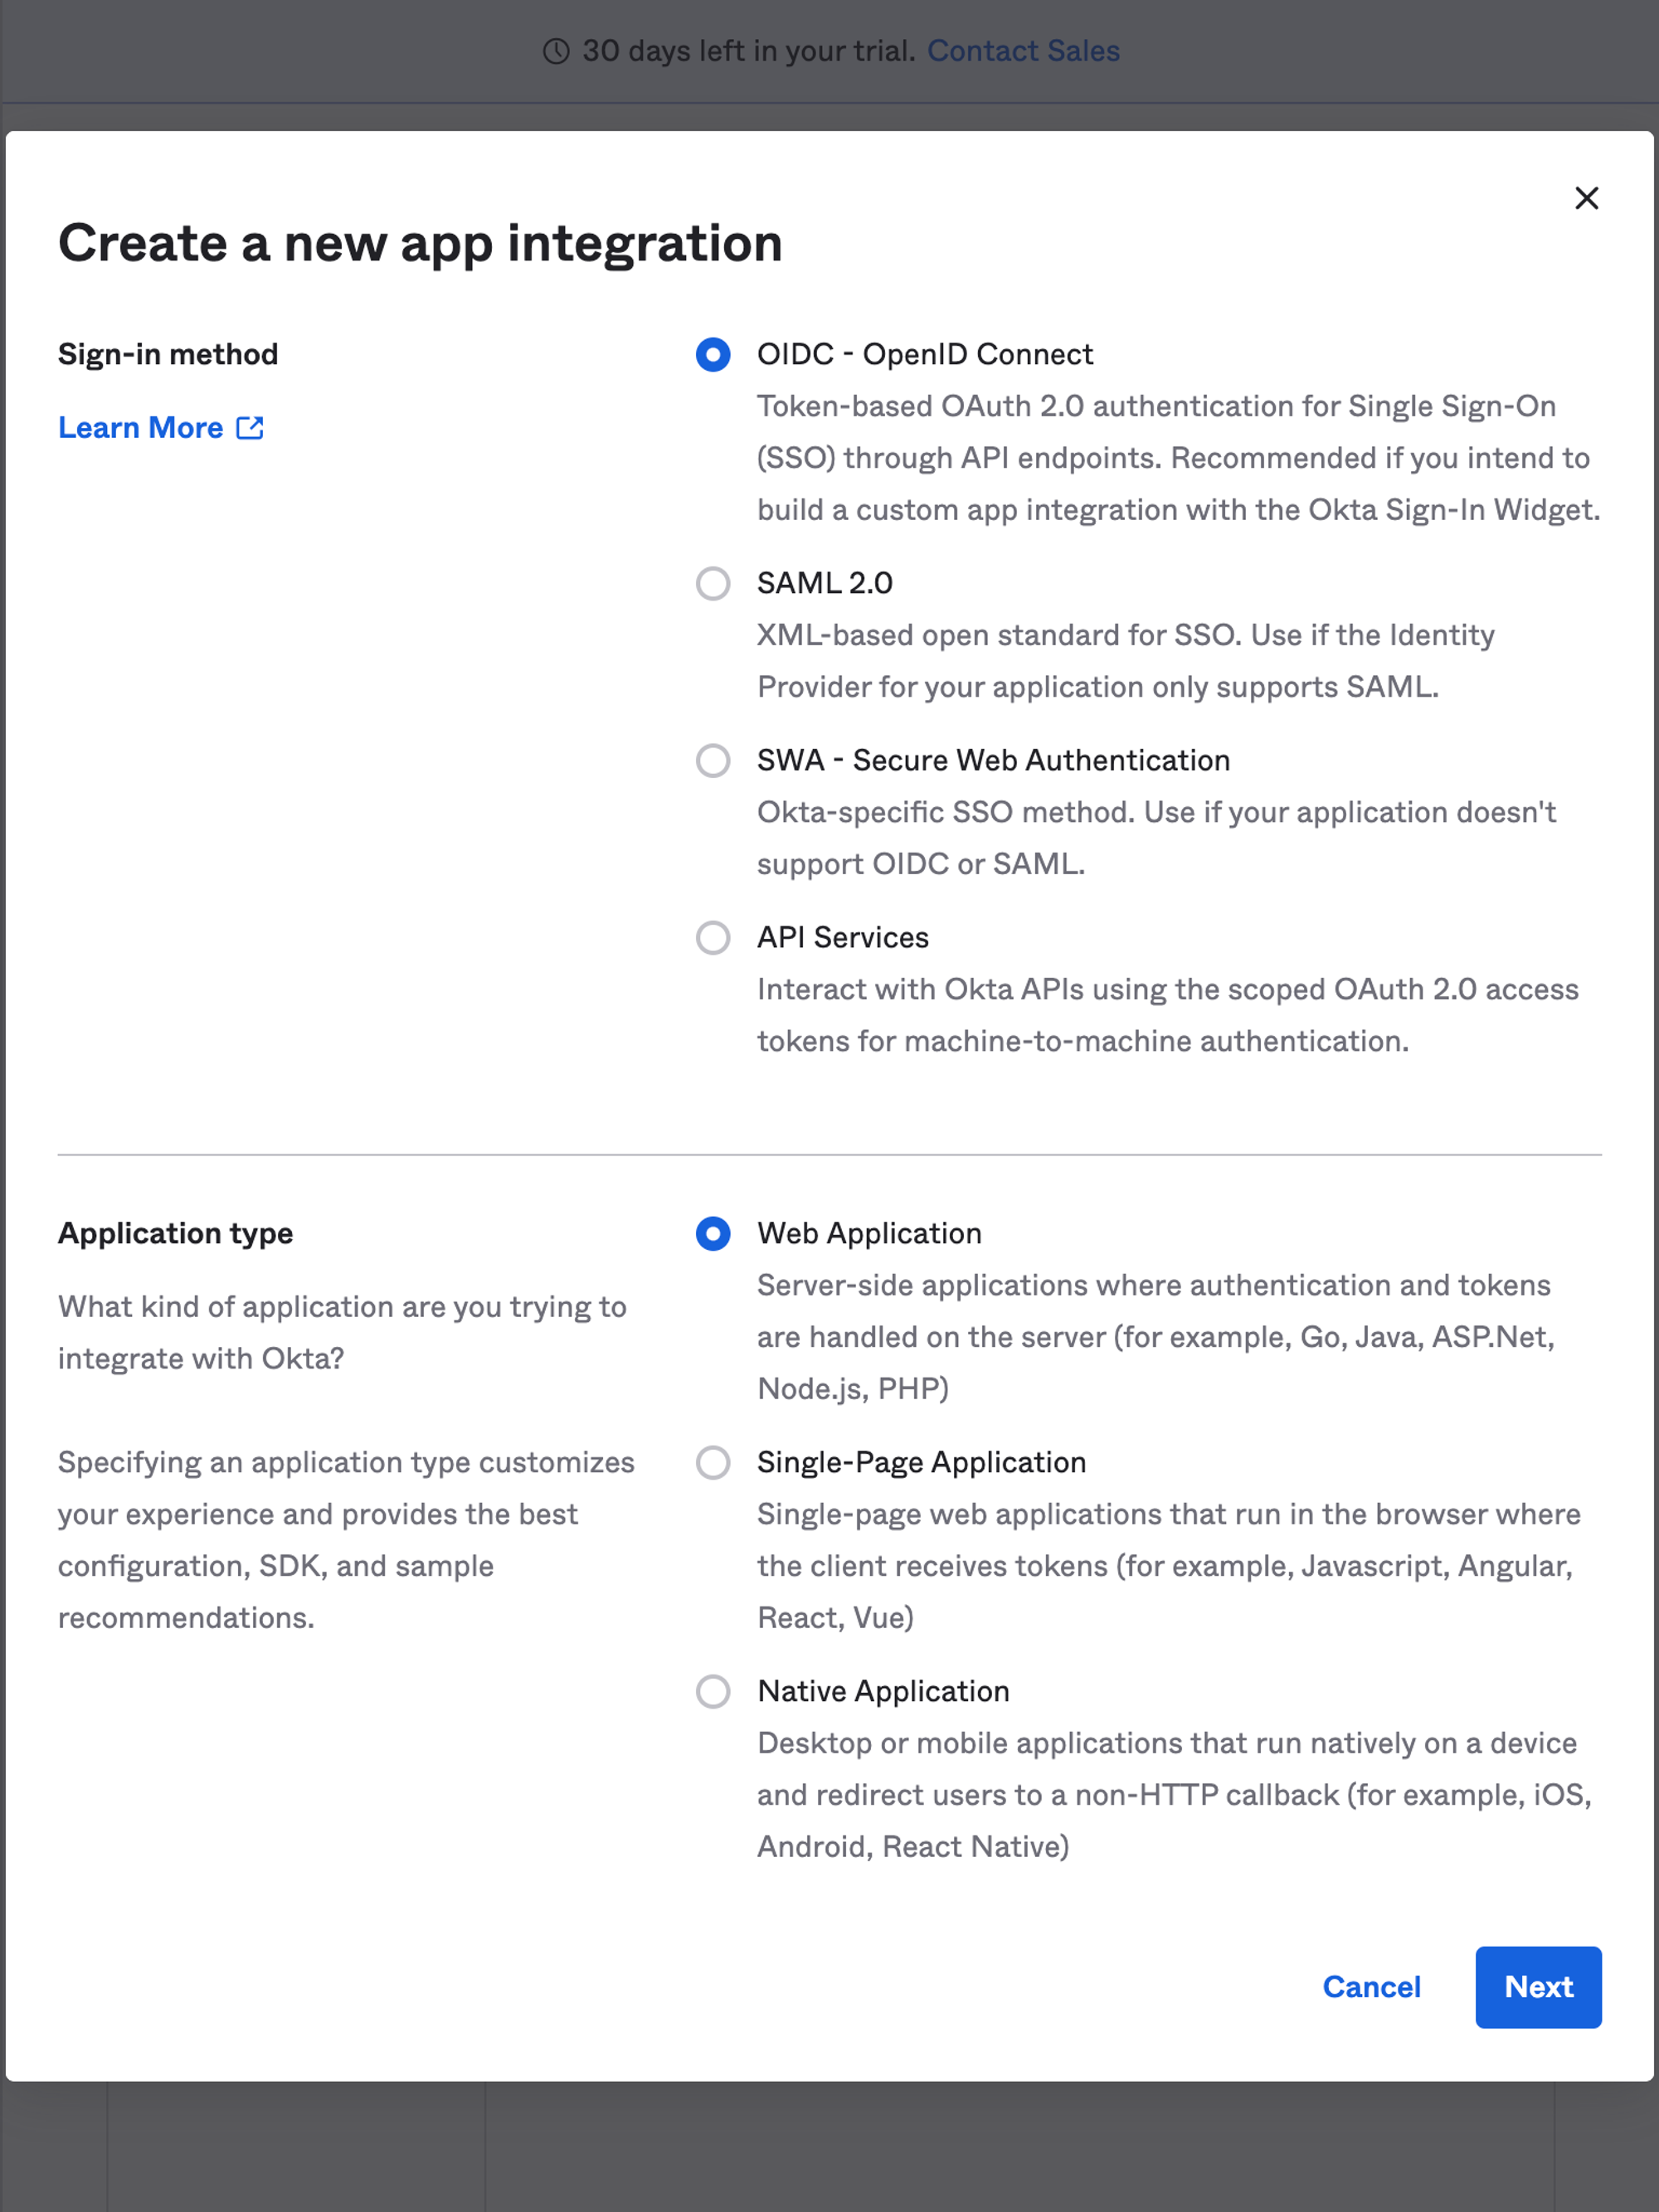
Select Next.
Enter Verbate as your App integration name.
Add the image linked here as your Logo.
Add Verbate’s tenant callback URL in the Sign-in redirect URIs field.
https://verbate.us.auth0.com/login/callback.
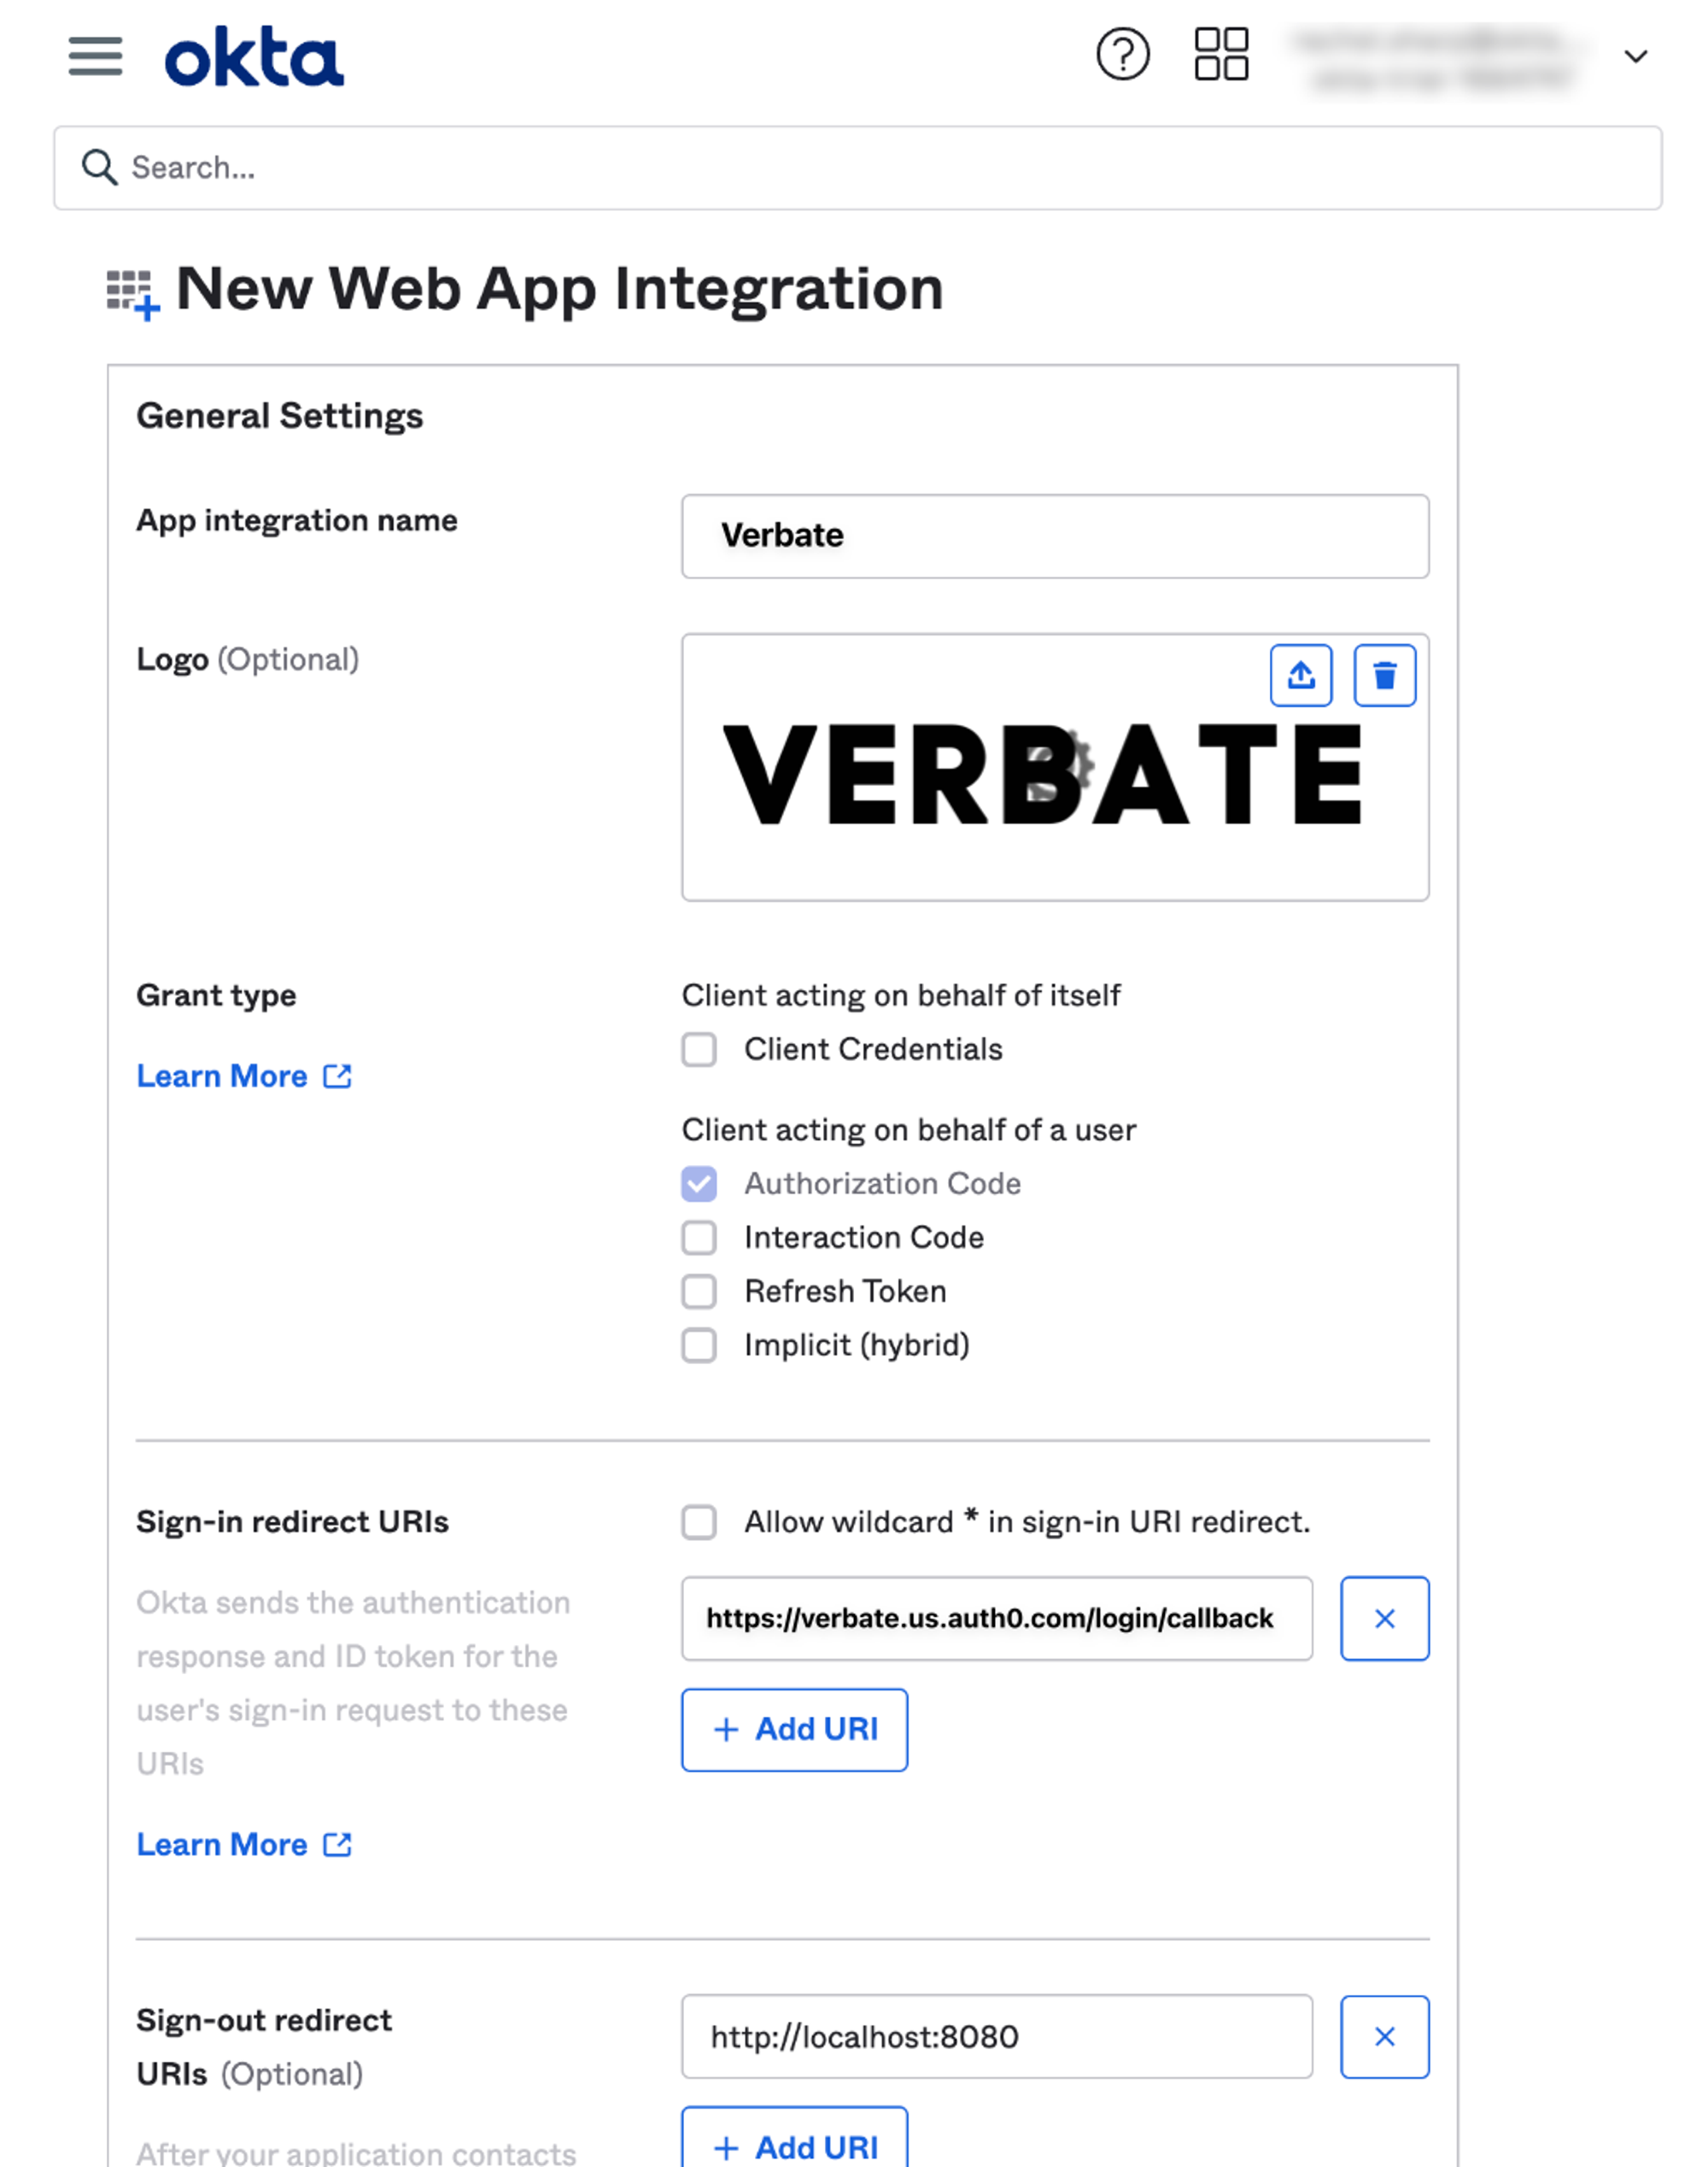
Select Create and find your Client ID and Client Secret fields. You will share these with the Verbate team to finish the configuration of your Okta Connection.
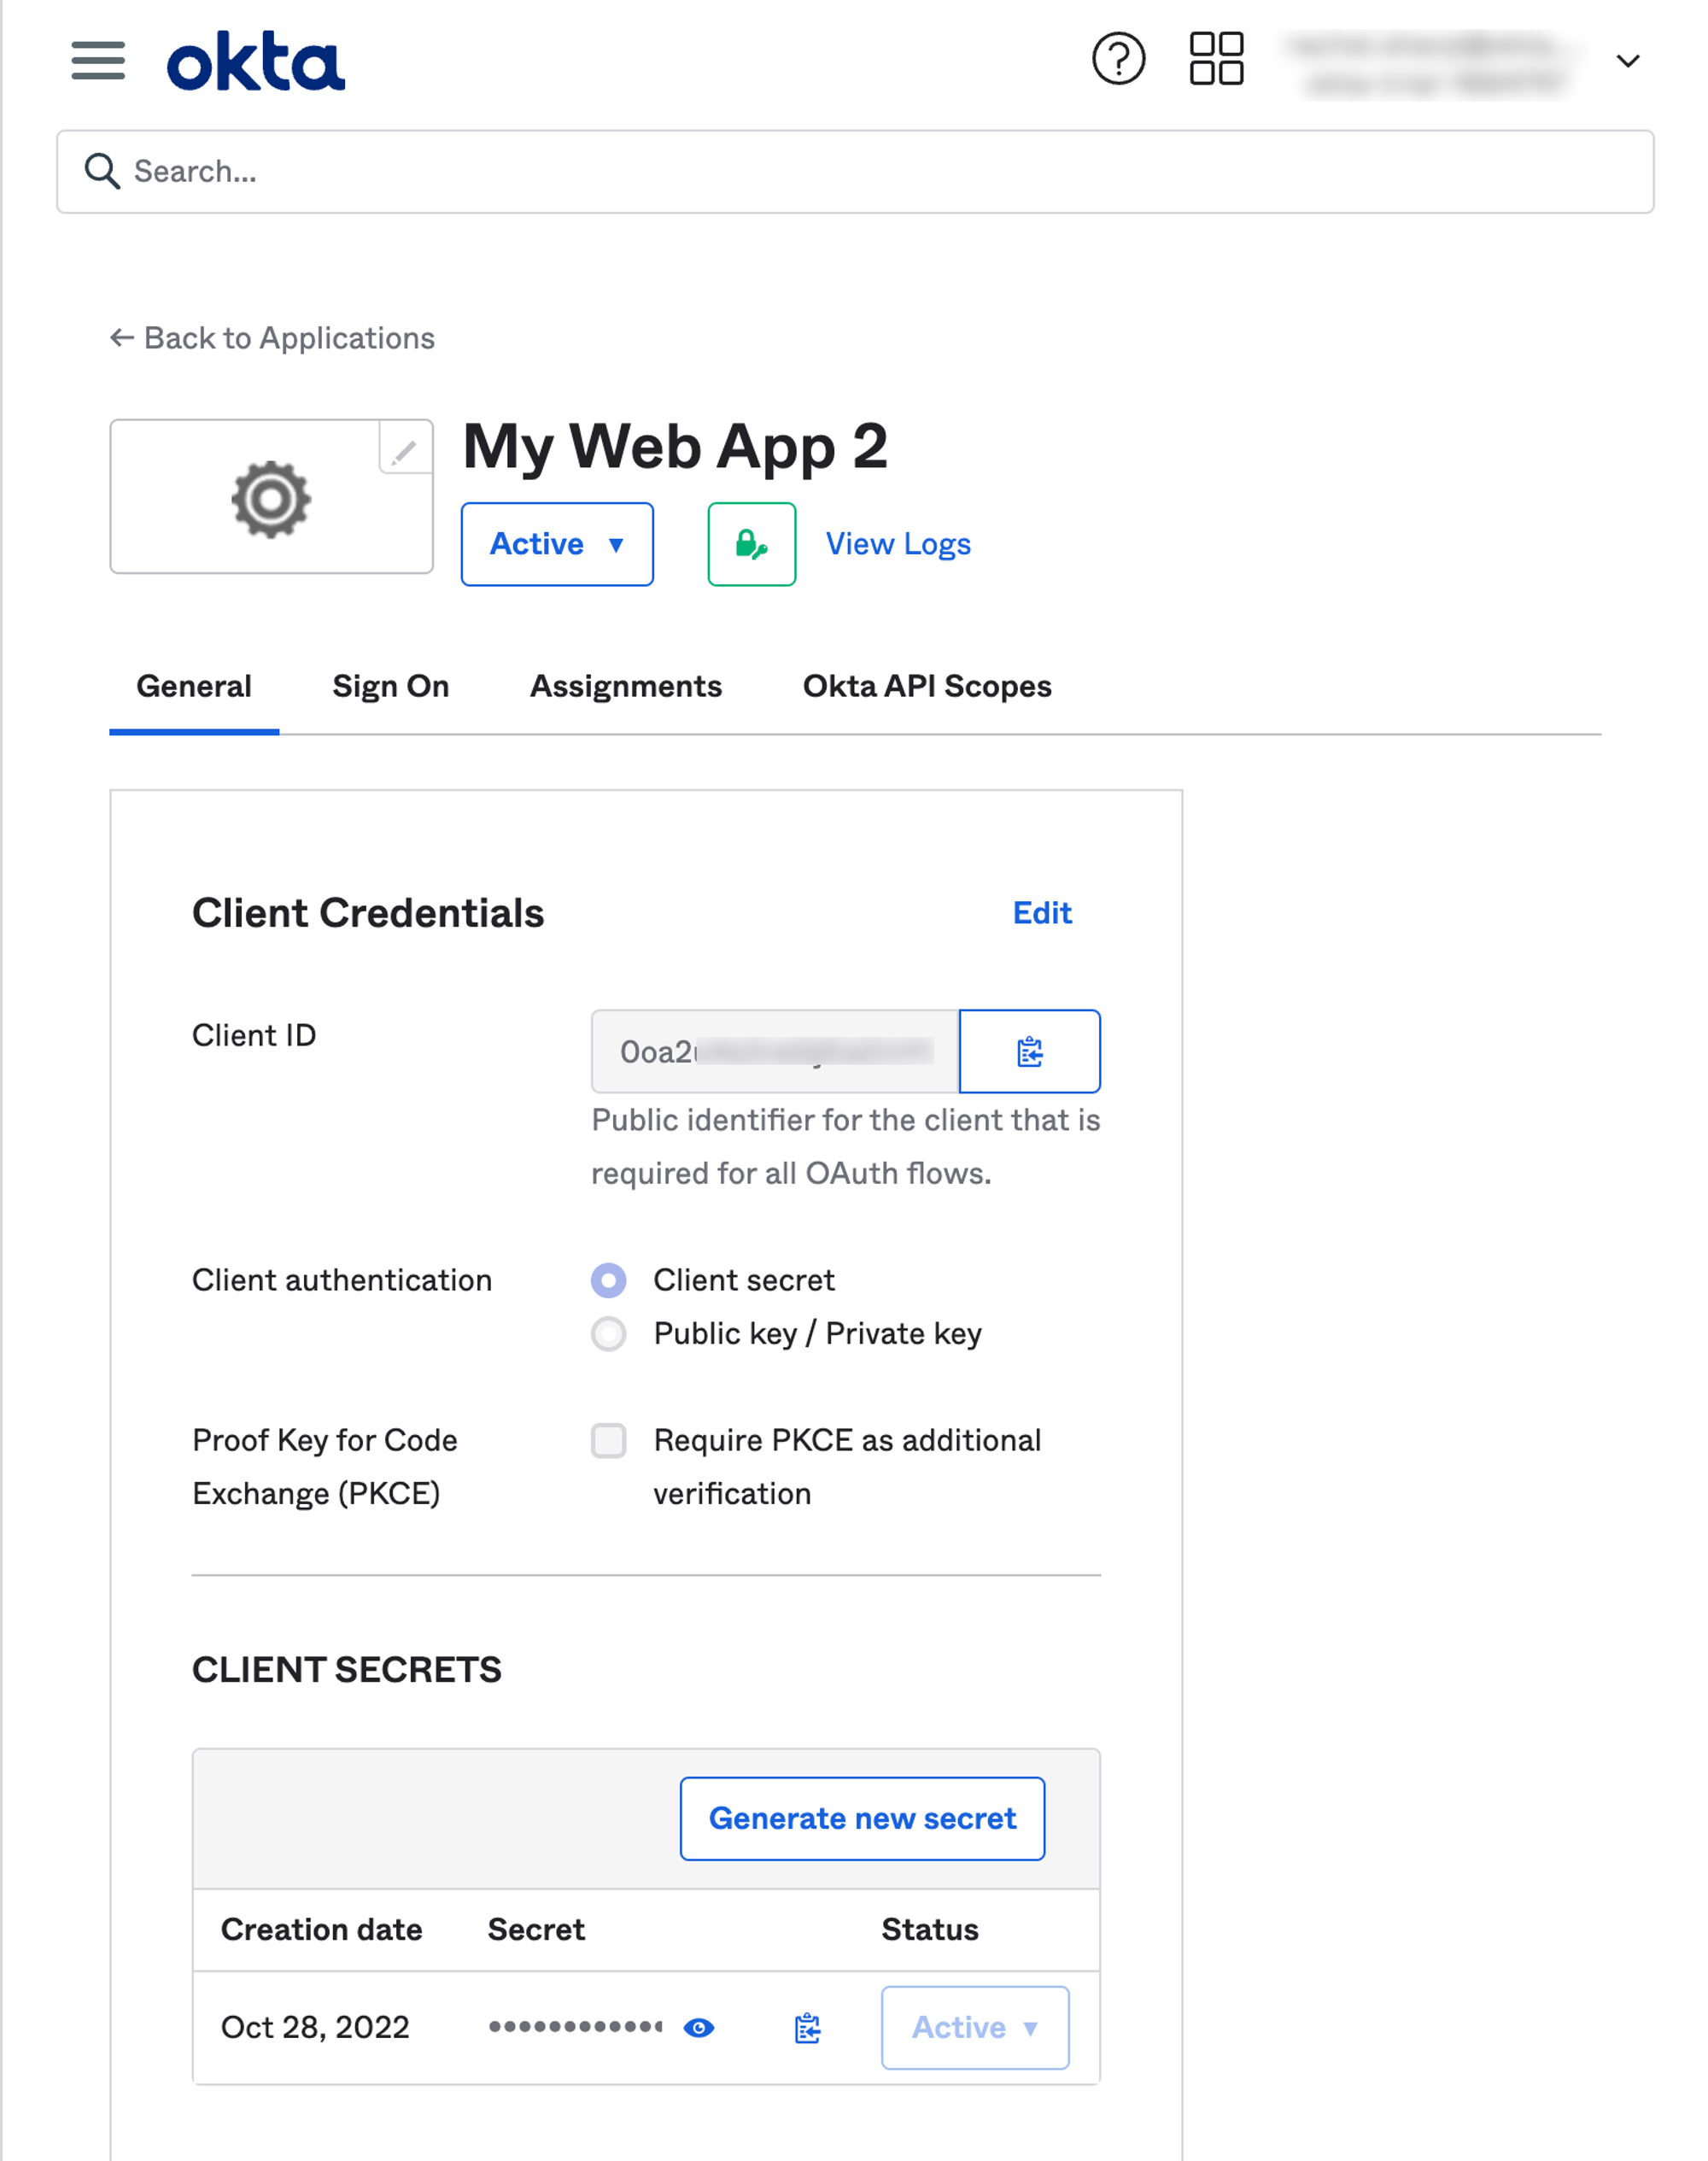
Add Users to your Application
If you’d like to give specific users permission to access Verbate, you will need to assign individual users and/or groups of users to the Okta app.
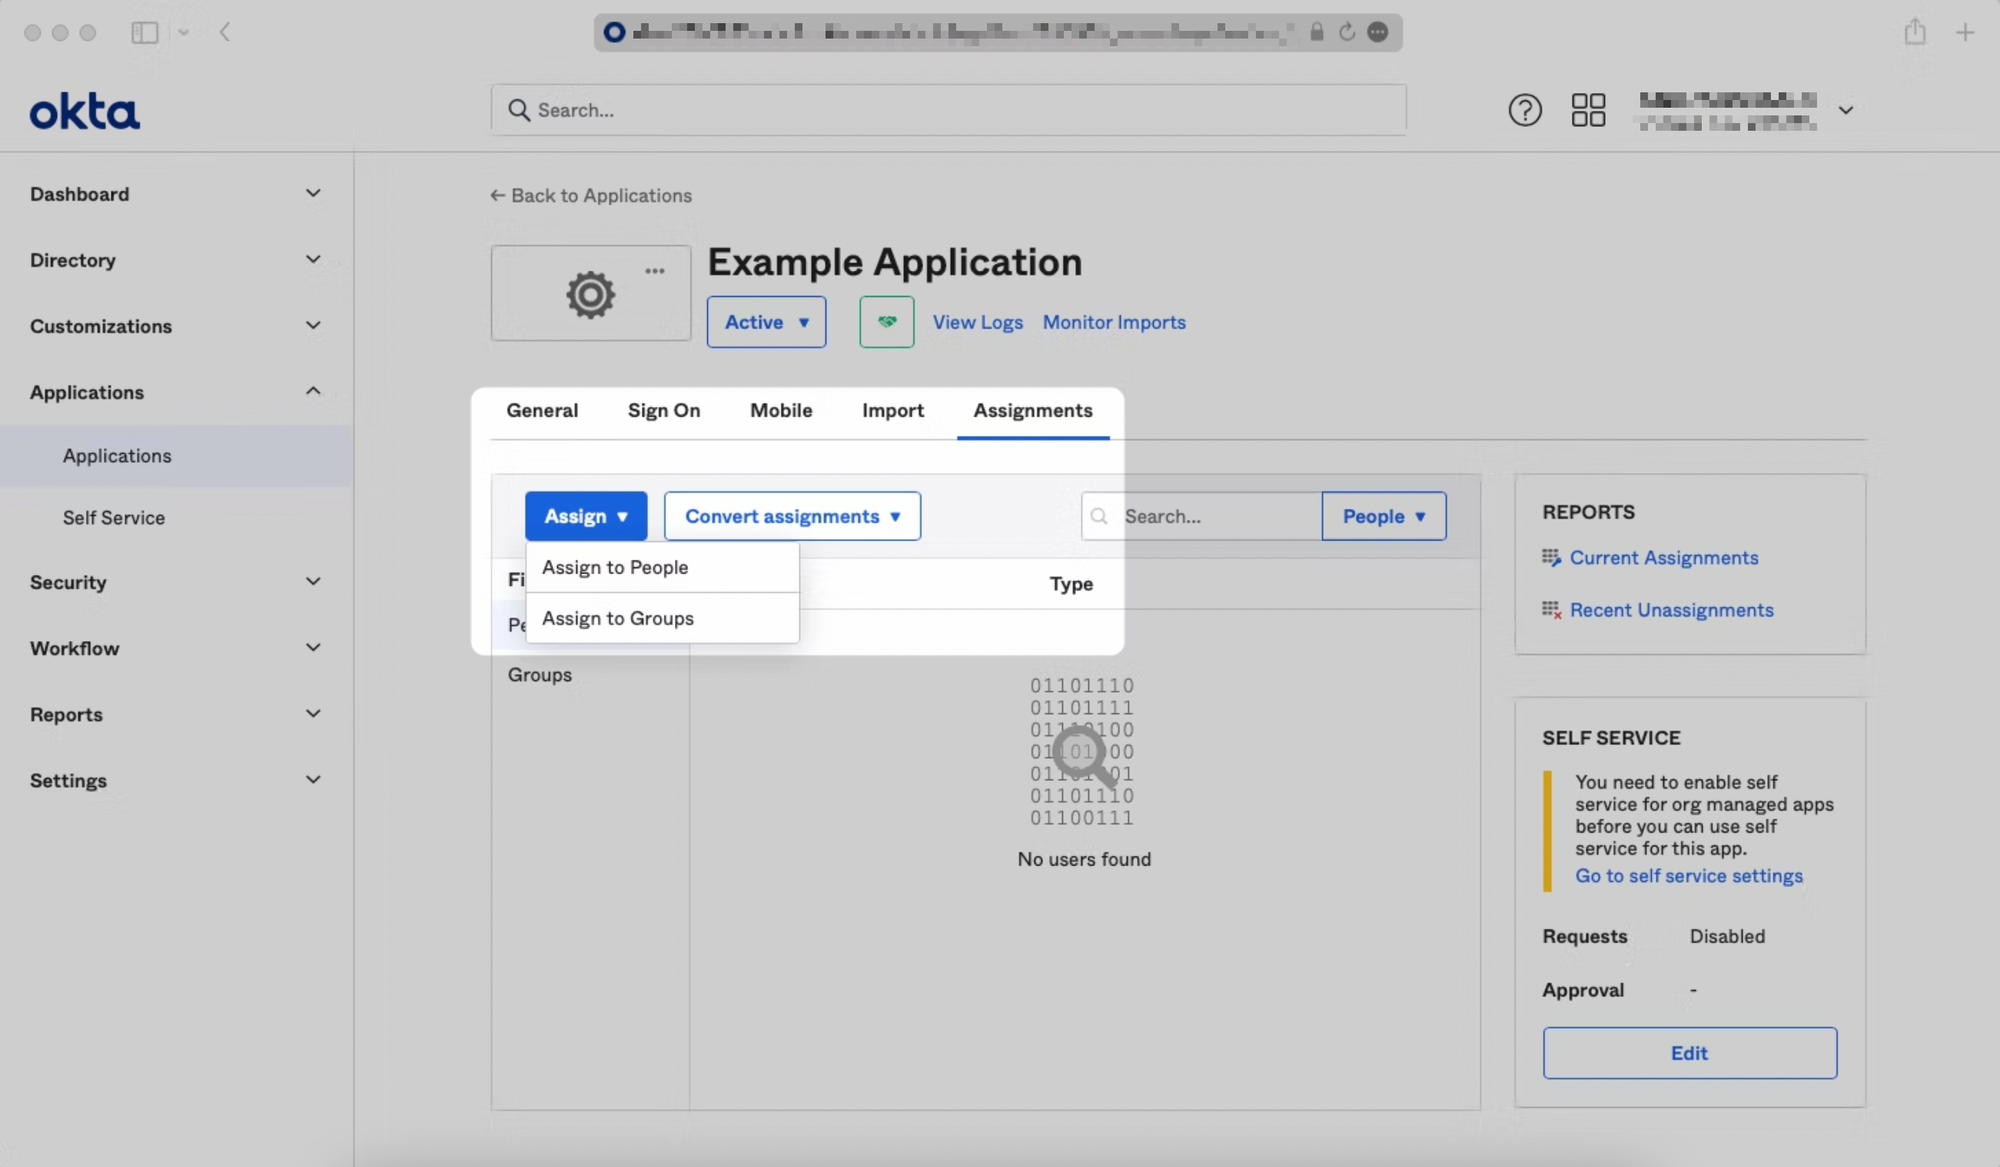
Click on the "Assignments" tab, and select either "Assign to People" or "Assign to Groups".
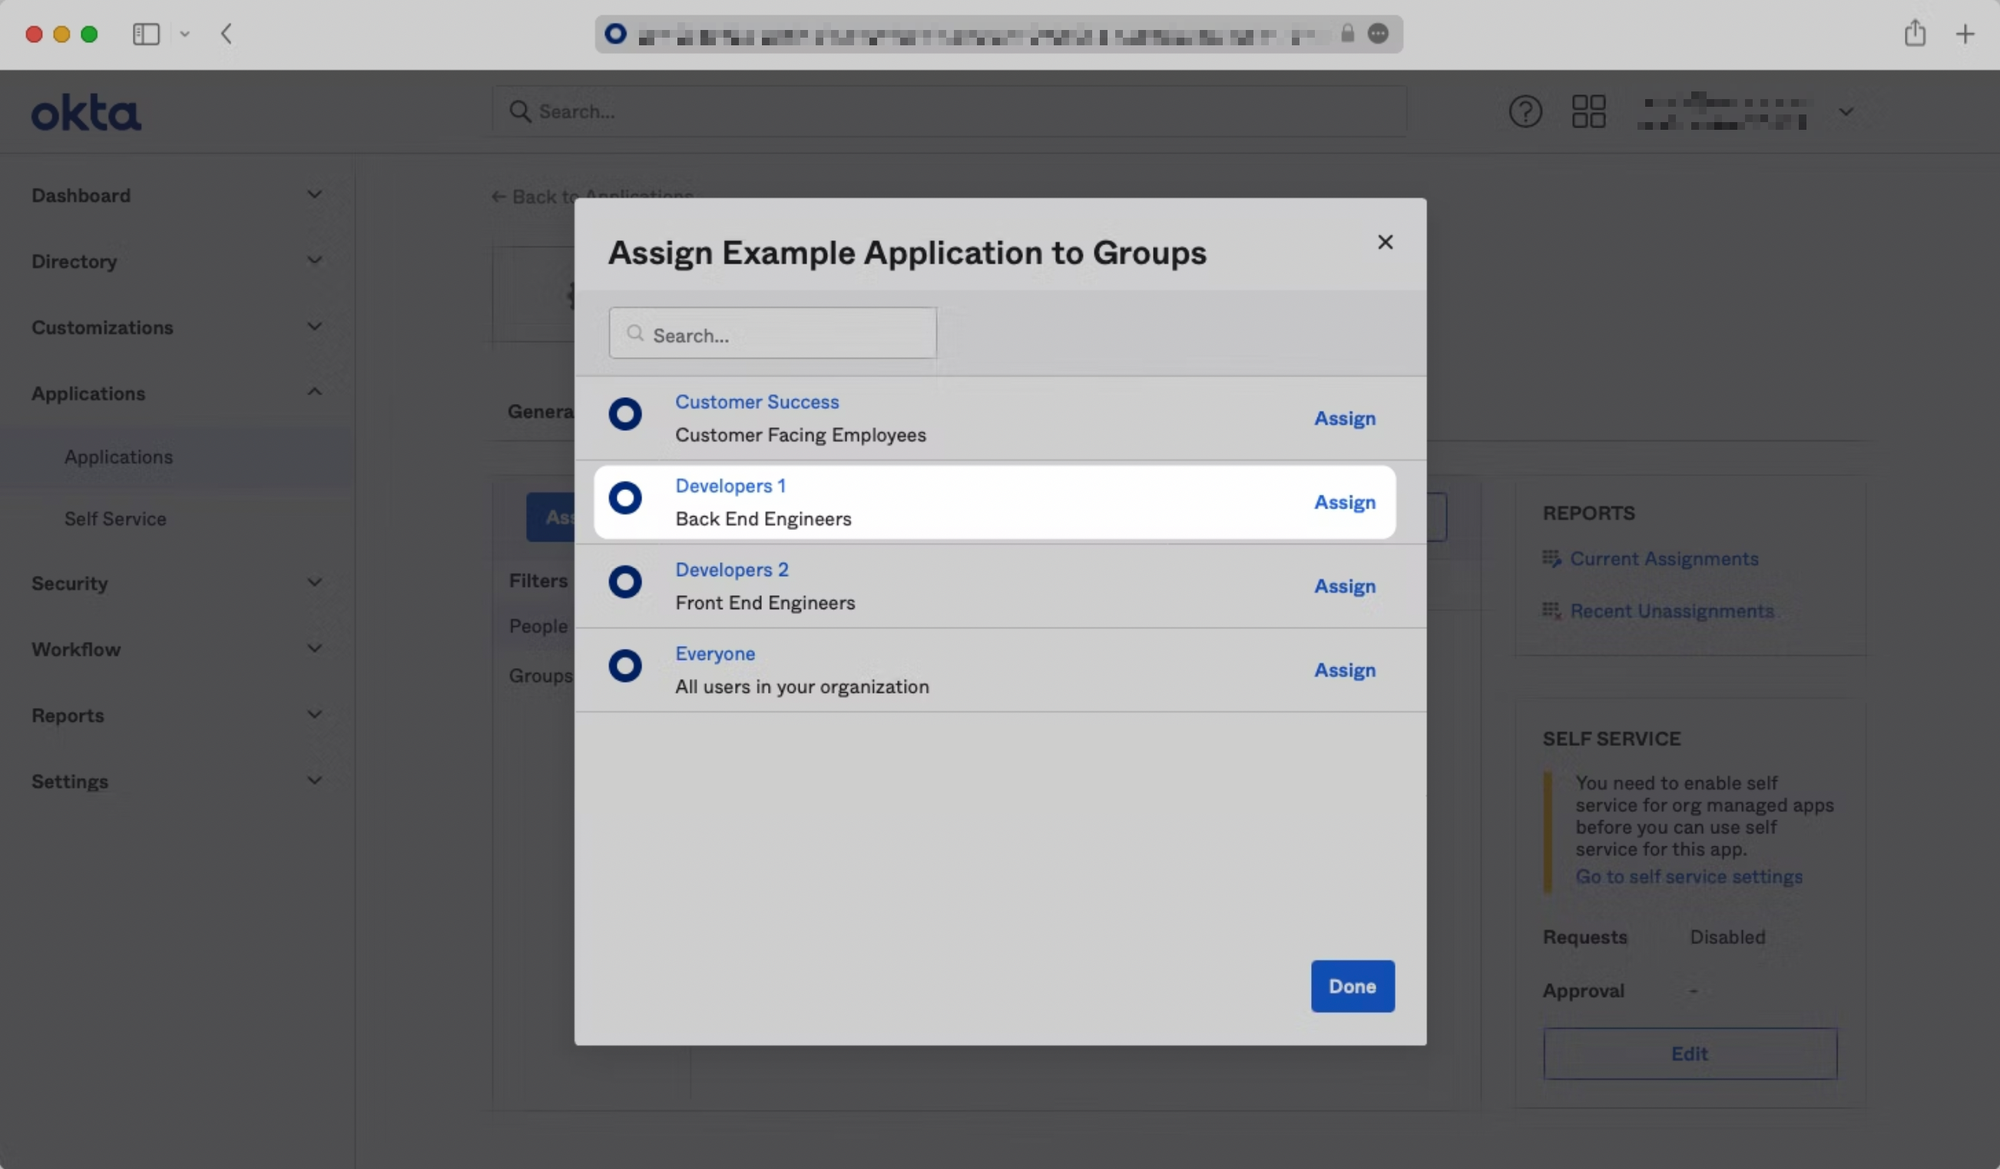
Find the individual user(s) and/or group(s) that you would like to assign to the app, and click "Assign" next to them. Click "Done" when you are finished.

Test the Application
Once you’ve shared your Okta domain, Client ID and Client Secret with Verbate, a member of our team will reach out to help you test the application.
Assuming that testing is successful, you can move on to making the application easily accessible by your employees by creating an App Bookmark.
Create an App Bookmark
To make Verbate easy for your employees to find, you can create an App Bookmark in Okta.
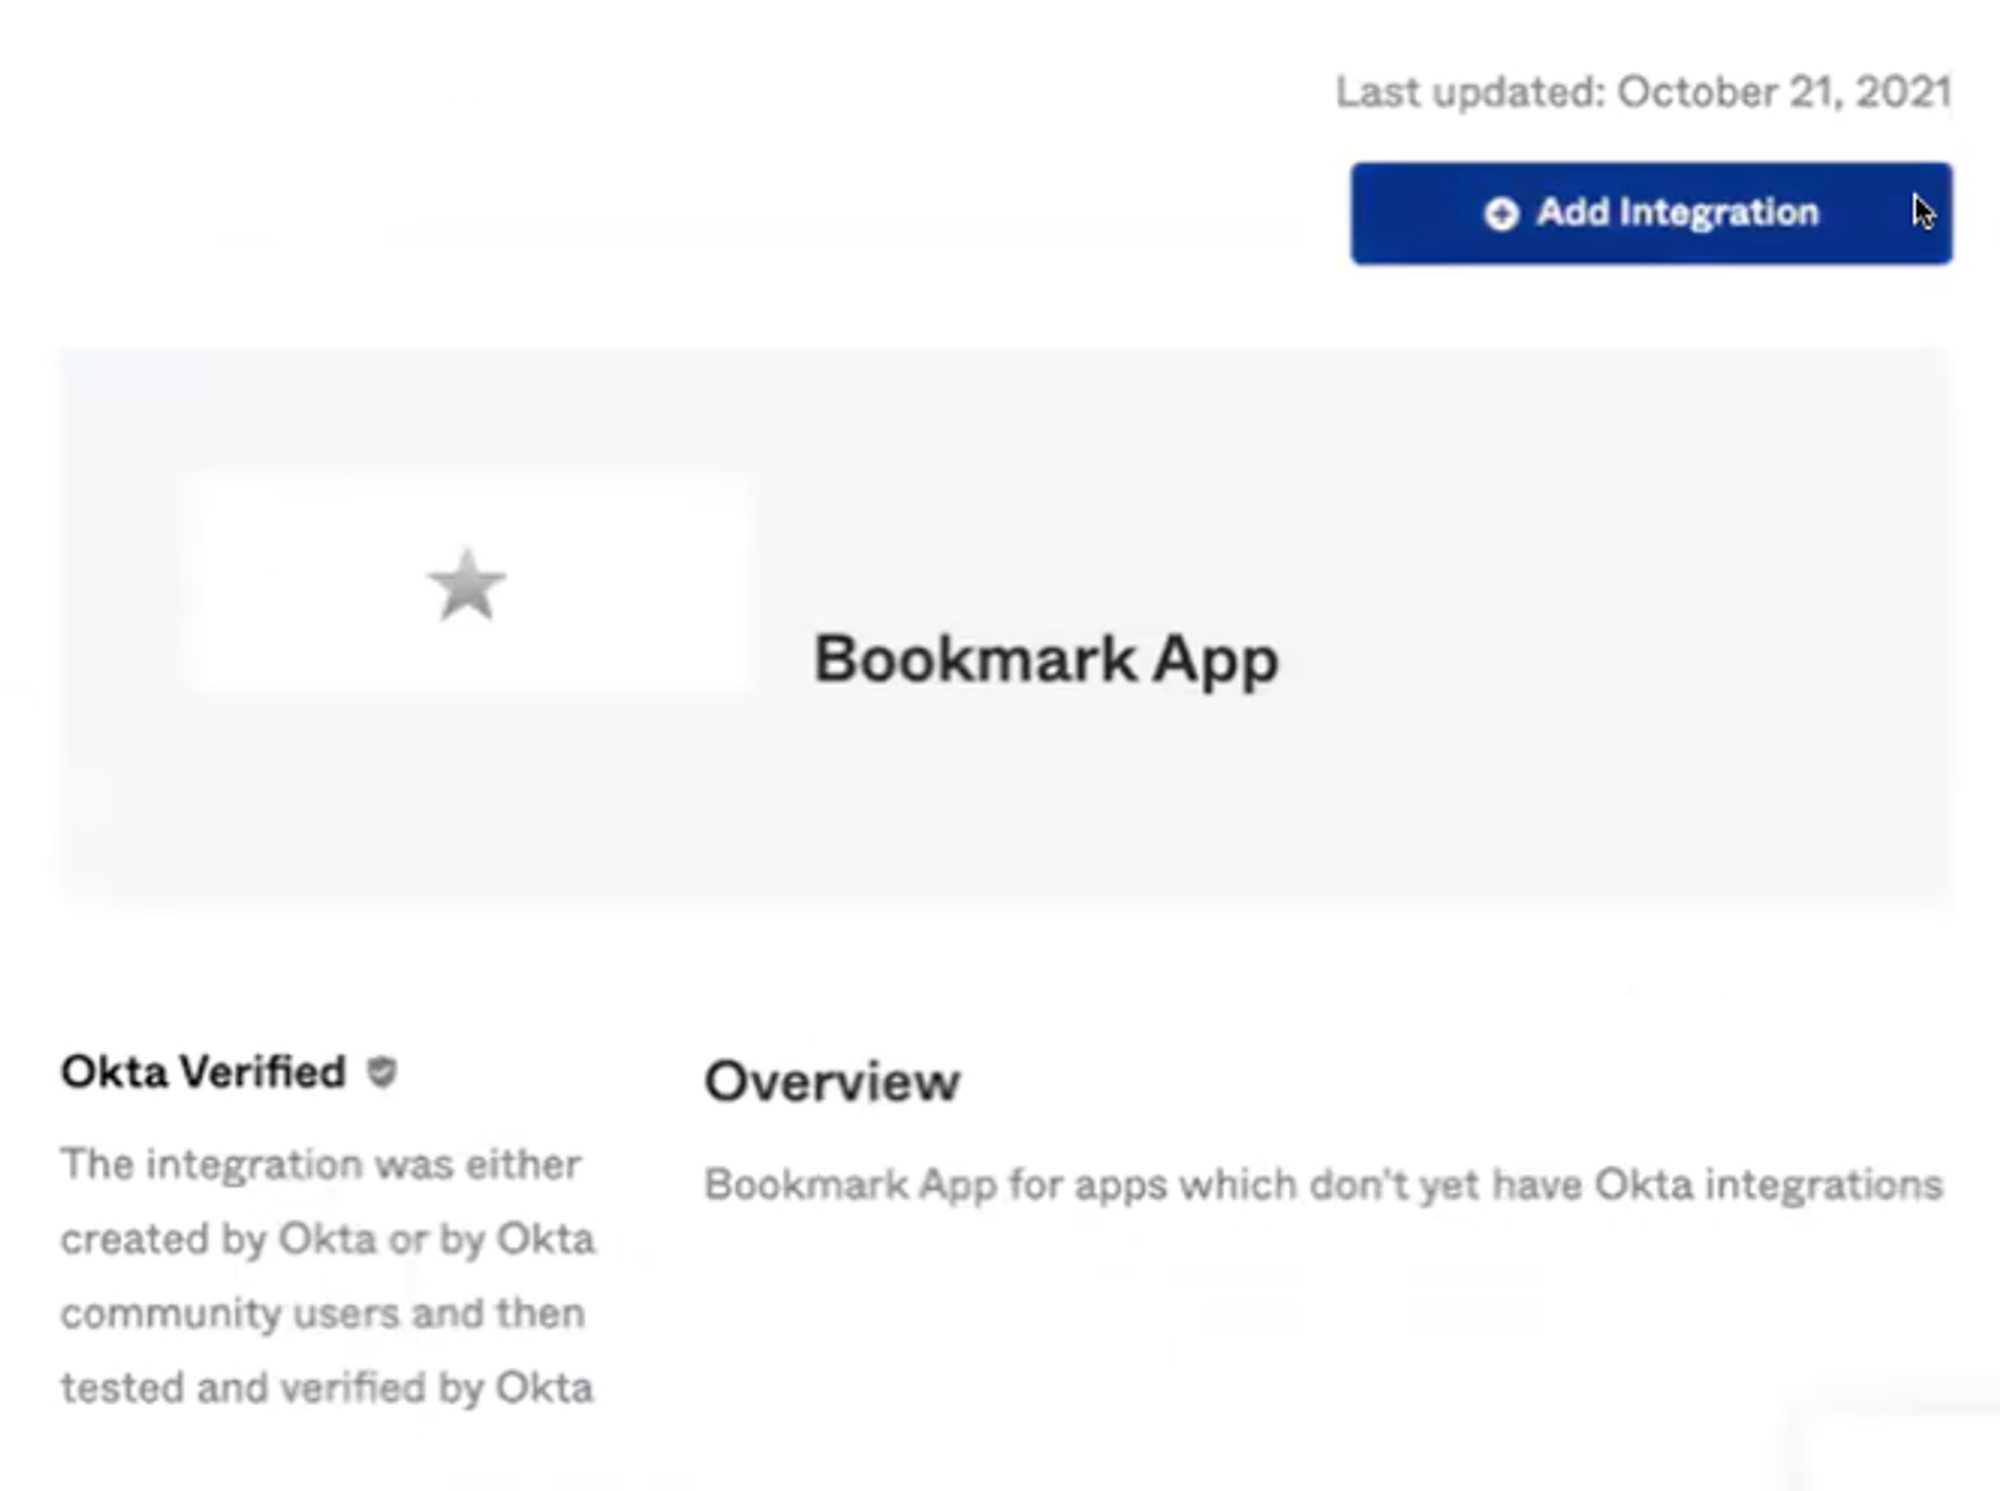
To make an App Bookmark, navigate to Applications > Browse App Catalog and search “Bookmark App”
Click “Add Integration” to create the Bookmark.
Once the bookmark is created, you’ll also be able to add the Verbate logo.
In the Bookmark App settings, add Verbate as the Application Label and https://portal.verbate.io as the URL.
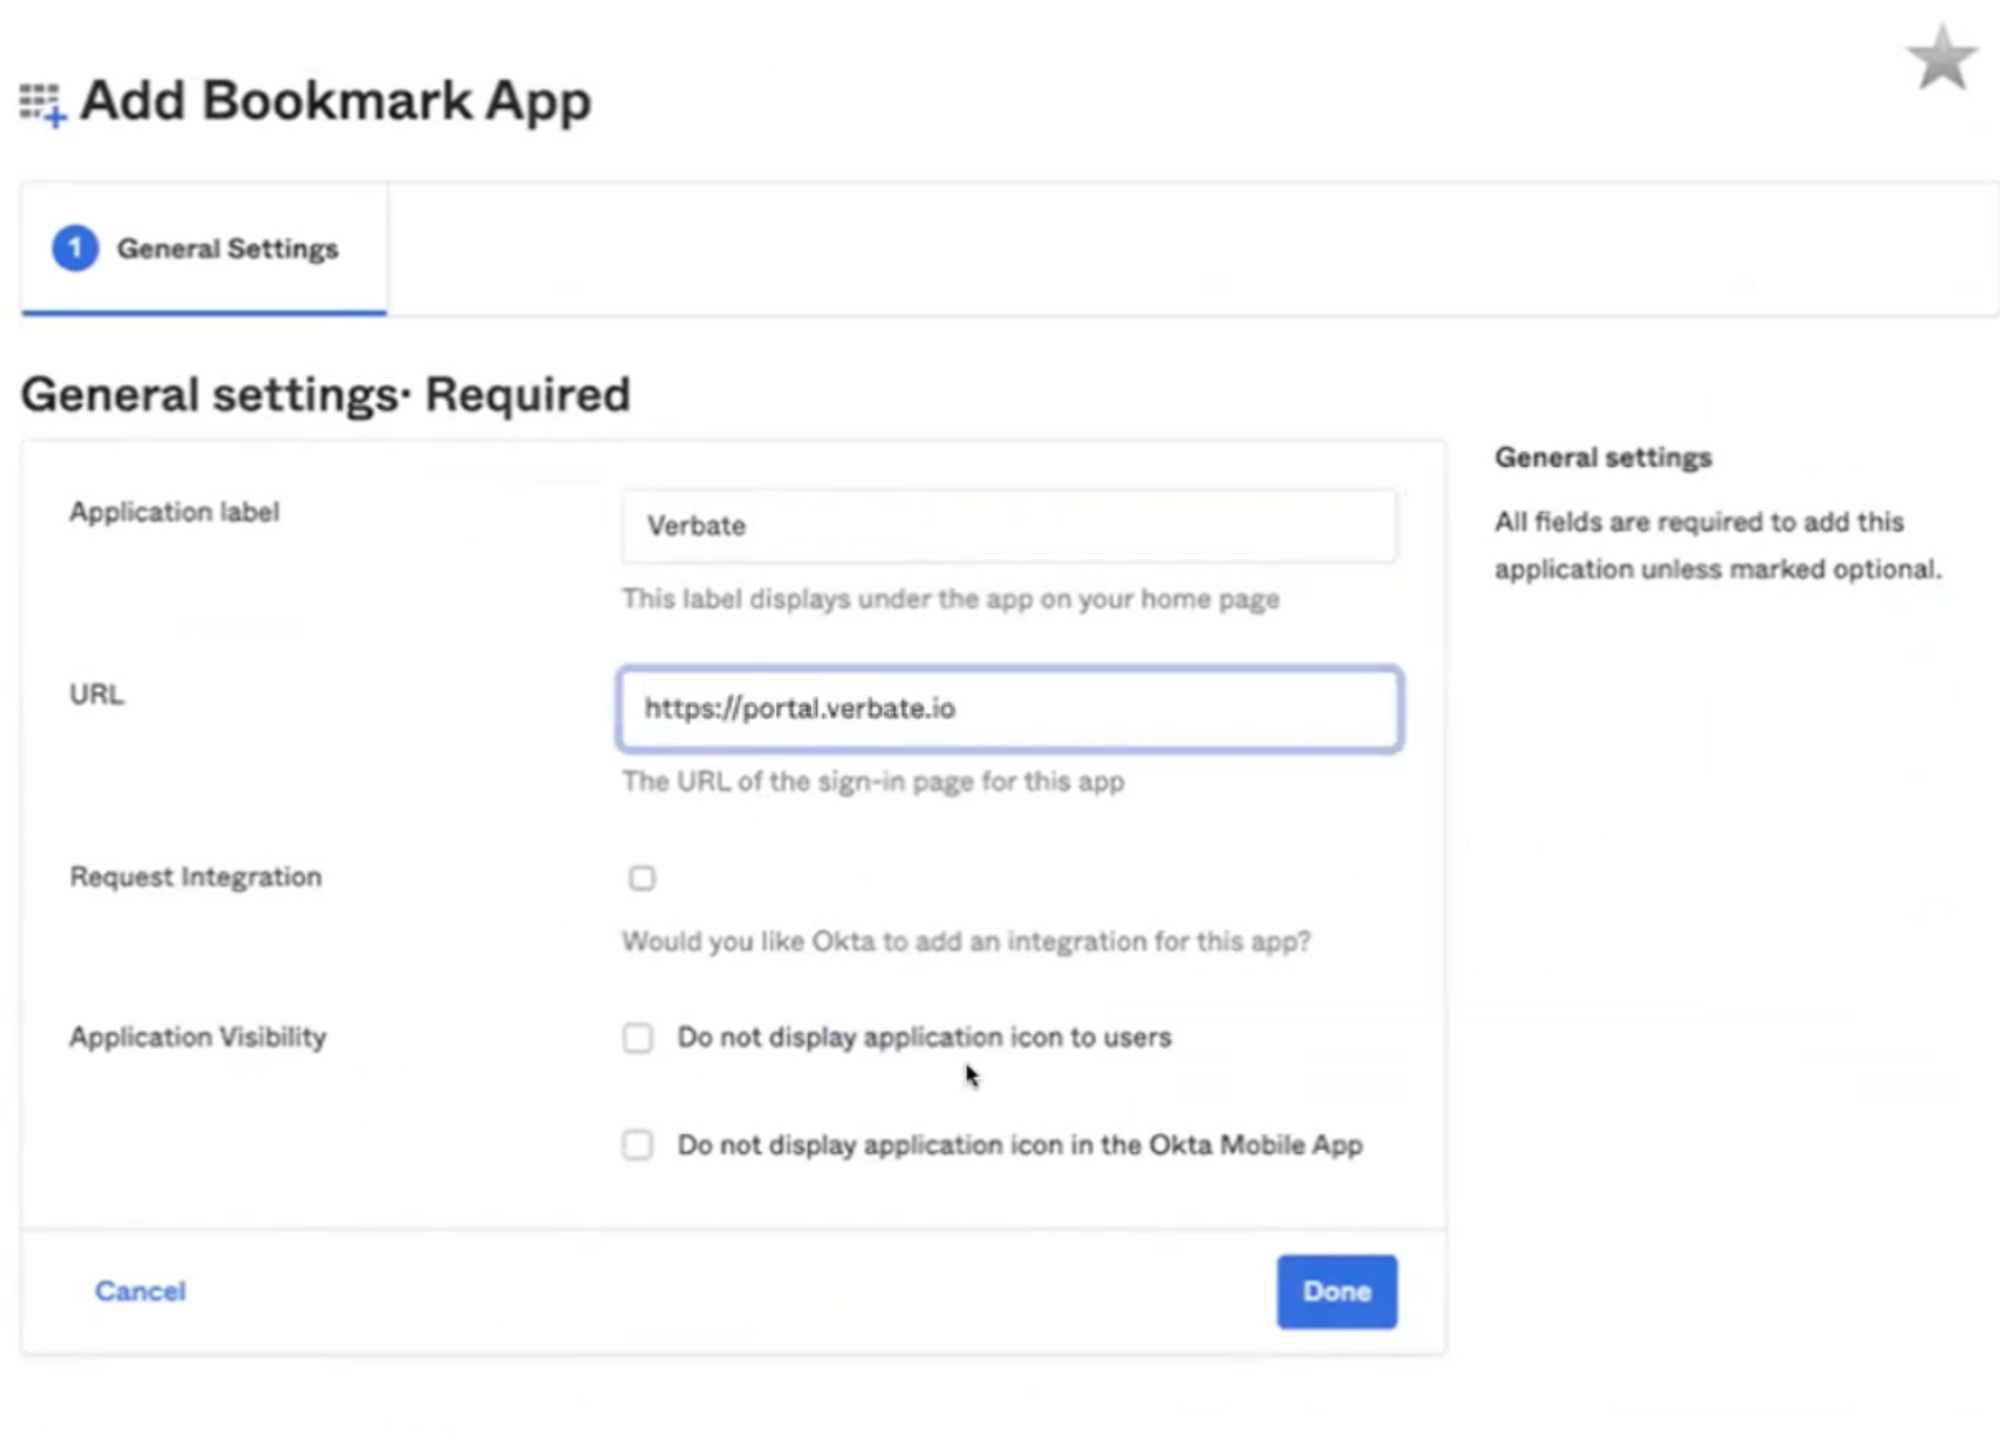
Once your Bookmark has been created, you can define your Application Visibility to mirror the user list you’ve granted application access to.
